How to Switch from Halogen to LED Outdoor Lighting 7 Tips?

Time:2026-10-03 Author:Charlotte
0%

Replacing halogen outdoor lights with LEDs can reduce energy use, heat, and maintenance. However, the change is not always a simple bulb swap. Fixture size, voltage, weather exposure, and wiring condition all affect the result.

This guide explains how to switch from halogen to led outdoor lighting through seven practical tips. It covers brightness, color temperature, beam angle, compatibility, and safe installation. A 50-watt halogen lamp may need only 6 to 8 watts from an LED. Yet wattage alone does not show brightness. Compare lumens, not just power ratings. Warm white LEDs around 2700K can preserve a welcoming garden appearance. Cooler colors may improve visibility but look harsh beside brick or wood.

Small details matter.

Check the fixture’s socket and operating voltage before purchasing a replacement. Some low-voltage systems need compatible LED drivers or transformers. Older transformers may flicker, buzz, or fail with low LED loads. Outdoor fittings should also carry an appropriate weather-resistance rating, such as IP65 where conditions require it. Turn off the power before inspection, and ask a qualified electrician to handle uncertain wiring or mains-voltage work.

In real installations, the first choice is not always perfect. A lamp can seem bright in a shop but create dark paths outdoors. I have also seen overly cool LEDs make a comfortable patio feel sterile. Test one fitting at night before replacing every lamp. The seven tips ahead will help you compare options carefully, avoid common mistakes, and create safer, cleaner outdoor lighting.
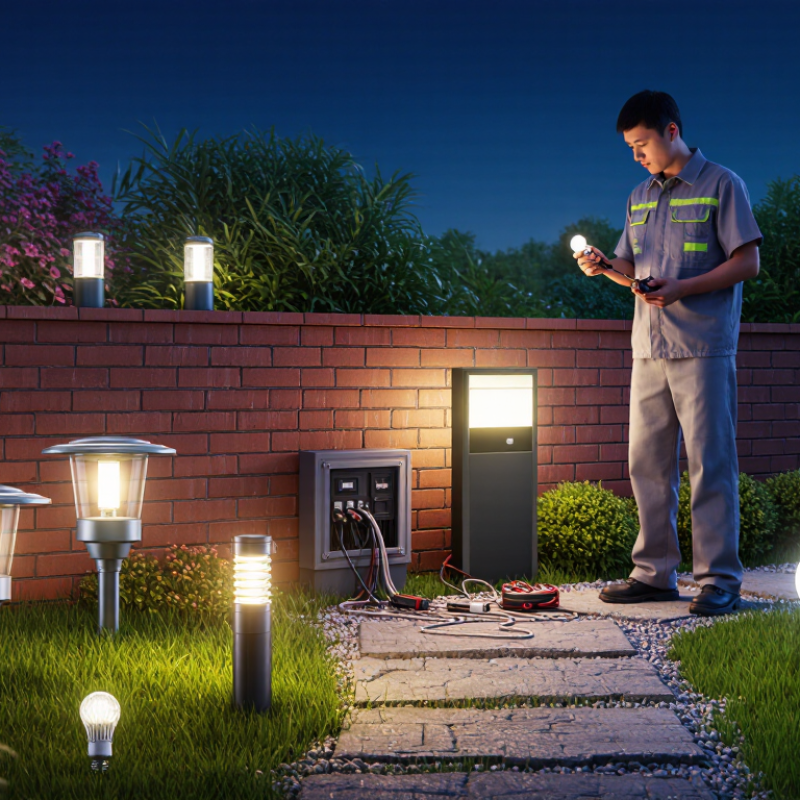
How to Switch from Halogen to LED Outdoor Lighting 7 Tips?

Audit Existing Halogen Output; Typical Lamps Deliver 15–25 lm/W

Before replacing every lamp, audit what the halogen system actually delivers. Typical halogen lamps produce only 15–25 lumens per watt, according to U.S. Department of Energy lighting assessments. That figure describes light output, not electricity consumed by transformers, controls, or losses. Record each lamp’s wattage, beam angle, mounting height, and measured lux at paths, steps, and entrances. A handheld meter helps, although readings can vary at night.

Look for the awkward details. A 50-watt halogen lamp may create a bright hotspot but leave the surrounding walkway dim. Dusty lenses, yellowed covers, and aging transformers can reduce useful output further.

The International Energy Agency’s 4E Solid State Lighting Annex reports that modern LED luminaires commonly exceed 100 lm/W, but real outdoor performance depends on optics, temperature, and driver quality. Do not compare lumens alone. Compare delivered light across the target area.

When selecting replacements, match the original beam pattern before increasing brightness. A narrow LED can produce glare near eye level. A wider optic may improve pedestrian visibility with fewer fixtures. Check color temperature, dimming compatibility, ingress protection, and cold-weather starting.

The U.S. DOE notes that LED efficacy and lifetime decline with heat, so ventilation and thermal design matter. My first audits often overestimate halogen output because fixtures look bright from a distance. That mistake is worth correcting.

Measure twice. Then test one LED fixture for a week before converting the whole installation.

Choose LED Replacements: DOE Says LEDs Use at Least 75% Less Energy

How to Switch from Halogen to LED Outdoor Lighting: 7 Tips

The U.S. Department of Energy reports that LEDs use at least 75% less energy than incandescent lighting. Many halogen lamps fall into this category. Actual savings depend on wattage, operating hours, and fixture design. Compare lumens, not bulb appearance. A 10-watt LED can often replace a 50-watt halogen lamp. Check the base and voltage. Confirm the replacement fits securely. Select a weather-rated LED for exposed outdoor fixtures. Damp locations need suitable protection.

Match the beam angle to the space. A narrow beam can highlight a tree, while a wide beam improves walkway coverage. Check dimmer compatibility before installation. Some LEDs flicker with older controls. Add a timer or motion sensor where practical. This can reduce unnecessary nighttime use. Inspect sockets and wiring for corrosion. Turn off power before touching the fixture. Hire a qualified electrician when wiring looks damaged or unfamiliar.

I initially focused on brightness and overlooked color temperature. Warm white usually feels more comfortable near entrances. Cooler light may reveal details, but it can appear harsh. Start with one replacement and observe it after dark. Shadows may change more than expected. Keep the old lamp nearby until the fit, brightness, and light spread feel right. A lower energy bill is valuable, but poor illumination can make the upgrade disappointing.

How to Switch from Halogen to LED Outdoor Lighting: 7 Tips

Choose LED replacements: LEDs use at least 75% less energy than incandescent lighting, including halogen lamps.

Tip What to Check Useful Data or Benchmark Practical LED Replacement Guidance Expected Benefit
1 Match brightness, not wattage Brightness is measured in lumens. A typical 50-watt halogen lamp commonly produces approximately 700–900 lumens, depending on lamp design. Select an outdoor LED lamp with a similar lumen output. Do not choose an LED based only on a “50-watt replacement” label. Comparable light output with substantially lower electricity use.
2 Compare the electrical load Example: replacing a 50 W halogen lamp with a 10 W LED reduces connected load by 80%. Use the actual wattage printed on the LED package or fixture specification when calculating savings. Lower energy consumption and reduced operating cost.
3 Verify the socket and voltage Common outdoor systems use line voltage such as 120 V or 230 V, while some landscape systems use low voltage such as 12 V or 24 V. Match the LED base, voltage, physical dimensions, and transformer requirements to the existing fixture. Improved safety, reliable starting, and fewer compatibility problems.
4 Choose the correct color temperature Warm white is typically around 2700–3000 K; neutral white is around 3500–4100 K; cool white is around 5000–6500 K. Use 2700–3000 K for a warm residential appearance and 3500–4100 K where a cleaner, brighter appearance is preferred. Consistent appearance and better visual comfort outdoors.
5 Check outdoor suitability Look for a suitable IP rating. IP65 generally indicates protection against dust and water jets; IP44 provides protection against solid objects larger than 1 mm and water splashes. Use a fixture or lamp rated for the location’s exposure to rain, dust, condensation, and direct water spray. Greater durability and reduced risk of moisture-related failure.
6 Confirm dimmer and control compatibility LEDs may require compatible dimmers, timers, photocells, or motion sensors. Compatibility is not guaranteed when an incandescent or halogen control is reused. Check the LED manufacturer’s compatibility information and test the complete control system before replacing every lamp. Flicker-free operation, stable dimming, and dependable automation.
7 Estimate annual energy savings Example calculation: one 50 W halogen used 4 hours per night consumes about 73 kWh per year. A 10 W LED used the same way consumes about 14.6 kWh per year. Calculation: watts ÷ 1000 × hours per day × 365. In this example, the saving is approximately 58.4 kWh per year per lamp. About 80% lower energy use in the example, before electricity-rate differences.
Important: Actual brightness, power consumption, service life, weather resistance, and compatibility vary by lamp and fixture. Always compare the rated lumens, watts, voltage, beam angle, IP rating, and control requirements before purchasing.
Reference: The U.S. Department of Energy states that LED lighting products use at least 75% less energy and last much longer than incandescent lighting. Halogen lamps are a type of incandescent lighting. Annual energy examples assume 4 hours of operation per night and do not include standby power.

Verify Base, Voltage, Dimming, and IP Ratings Before Installation

Switching from halogen to LED outdoor lighting is not only a bulb change. The fitting, wiring, transformer, and control system must work together. I once replaced a halogen lamp without checking its base. The new lamp fitted loosely, flickered, and needed replacing. Measure the old lamp base and compare its shape, pins, and size with the LED specification. Never force a near match.

Check the voltage before installation. Some LED lamps require low-voltage power, while others connect directly to household voltage. An unsuitable transformer may cause buzzing, flickering, or early failure. Confirm the transformer’s minimum and maximum load, especially when using fewer LEDs. Dimming needs equal care. A standard dimmer may not support LED drivers. Use a dimmer marked for the lamp’s voltage and load range, then test it at the lowest setting.

Outdoor exposure makes IP ratings essential. Select protection suitable for rain, dust, and the installation location. A covered porch and an open garden wall do not face the same conditions. Inspect seals, cable entries, and drainage paths before switching on the power. Keep connections above standing water. Local electrical rules may require a qualified electrician, particularly for mains wiring. My own planning was once too optimistic; checking the instructions again would have prevented extra work. Test one fixture first, then install the remaining lights.

Replace Incompatible Transformers and Check Outdoor Wiring Safety

How to Switch from Halogen to LED Outdoor Lighting: 7 Tips

Replacing halogen lamps with LEDs is not always a simple bulb swap. Many outdoor halogen systems use a 12-volt transformer designed for a higher minimum load. LEDs draw much less power, so the old transformer may flicker, buzz, or fail to start. The U.S. Department of Energy reports that LEDs use at least 75% less energy and can last up to 25 times longer than incandescent lighting. Check the transformer’s output voltage, minimum load, AC or DC compatibility, and dimming requirements before installation. Replace it when specifications do not match.

Outdoor wiring deserves equal attention. Turn off the circuit at the breaker, then verify it with a tester. Inspect cracked insulation, loose terminals, water inside junction boxes, and damaged cable buried near planting areas. Use weather-resistant boxes, sealed connectors, and fittings rated for outdoor exposure. Ground-fault protection is essential where local electrical codes require it. The National Electrical Code provides detailed requirements for outdoor wiring, but local rules may differ. A licensed electrician should assess unfamiliar or buried circuits.

Do not rely on appearance alone. A dry connection can still hide corrosion inside. Keep transformer housings ventilated and above standing water. Confirm cable size and voltage drop, especially on long garden runs. I would also test the system after rain, not only on installation day. That small step is easy to overlook. LED conversion saves energy, but an incompatible transformer can make the upgrade unreliable and unsafe.

How to Switch from Halogen to LED Outdoor Lighting

Typical annual energy use per outdoor fixture is compared below. The estimate assumes 4 hours of operation per day for 365 days and excludes standby losses.

Before replacing halogen lamps, confirm that the existing transformer supports the LED lamp’s voltage and minimum load. Check the total LED wattage against the transformer rating, inspect outdoor wiring for damaged insulation or moisture, and use weather-rated connections and enclosures.

Test Illumination and Payback Using IES Levels and Local Energy Rates

Switching outdoor halogen fixtures to LED should begin with measured light, not a wattage guess.

I compare the current installation with IES-recommended illuminance levels for paths, entrances, steps, and parking areas. A calibrated light meter records readings at night, especially at dark corners and walking height. Keep the same grid after conversion. This makes brightness visible. It also prevents over-lighting, glare, and wasted energy. In practice, one fixture may look brighter while leaving a nearby step underlit.

Record each halogen lamp’s wattage, quantity, operating hours, and replacement history. Then calculate annual energy cost with local utility rates: watts divided by 1,000, multiplied by hours and price per kilowatt-hour. Repeat the calculation for the proposed LEDs.

Include installation, controls, disposal, and expected maintenance. A simple payback estimate divides total project cost by annual savings. Use actual tariff data, not a generic online average. Rates can vary by season, demand, or time of use.

After installation, test the same points under similar weather and darkness.

Check uniformity, glare, color appearance, and sensor timing. I prefer a short field log with dates, meter readings, and utility invoices. It supports an auditable decision. Yet payback is not perfectly predictable. Dirt, voltage changes, failed drivers, and longer operating hours can alter the result. I once underestimated cleaning delays. That mistake mattered. Recheck illumination after several weeks, then compare real consumption with the forecast before expanding the project.

FAQS

How much energy can LED outdoor lighting save compared with halogen?

LEDs often use at least 75% less energy than incandescent-style lighting. A 10-watt LED may replace a 50-watt halogen lamp. Actual savings depend on hours, wattage, and fixture design. Not always.

Should I compare watts or lumens when choosing an LED?

Compare lumens, not bulb appearance or wattage alone. Lumens show the light produced. A smaller LED can look brighter than the old halogen lamp. Check the beam angle, too.

What should I check before installing an outdoor LED?

Confirm the base, voltage, dimensions, and fixture compatibility. Compare the pins, shape, and size with the LED specification. Never force a nearly matching base. It may fit loosely and flicker.

Can an LED work with my existing transformer?

Check whether the LED needs low-voltage or household-voltage power. Confirm the transformer’s minimum and maximum load. Using fewer LEDs may fall below the transformer’s required load. Buzzing can be a warning.

What outdoor protection rating should I choose?

Select an IP rating suitable for rain, dust, and the installation location. An exposed garden wall needs more protection than a covered porch. Inspect seals, cable entries, and drainage paths. Keep connections above standing water.

How can I improve light coverage around paths and trees?

Use a narrow beam to highlight a tree or feature. Choose a wider beam for walkways and steps. Measure light at walking height, especially near dark corners. Shadows may change.

Will LED lighting work with an older dimmer?

Not every LED works with an existing dimmer. Some older controls can cause flickering or limited brightness. Use a dimmer rated for the lamp’s voltage and load range. Test the lowest setting.

How can I estimate the financial payback of an LED upgrade?

Record wattage, fixture quantity, operating hours, and local electricity rates. Calculate annual cost using watts divided by 1,000, hours, and price per kilowatt-hour. Include installation, controls, maintenance, and disposal costs. Generic rate estimates can mislead.

How should I test the new lighting before replacing every fixture?

Replace one fixture first and observe it after dark. Compare brightness, uniformity, glare, color, and light spread. Keep the old lamp nearby until the fit feels reliable. Recheck the area after several weeks.

Conclusion

Learning how to switch from halogen to led outdoor lighting begins with an audit of your current system. Record each lamp’s wattage, brightness, beam direction, operating hours, and mounting location. Typical halogen lamps produce only about 15–25 lumens per watt, so LED replacements can provide similar or greater illumination with much lower energy use. In general, LEDs use at least 75% less energy, which may significantly reduce long-term operating costs.

Before installation, confirm that each LED matches the existing base, voltage, dimming method, color temperature, and outdoor IP rating. Check whether the current transformer is compatible, since some older transformers may cause flickering or failure and should be replaced by a qualified professional. Inspect outdoor wiring, connections, grounding, and weather protection for safety. After installation, test coverage and brightness against appropriate IES illumination levels, adjust aiming as needed, and estimate payback using local electricity rates, purchase costs, expected service life, and annual operating hours.

Charlotte

Charlotte

Charlotte is a seasoned marketing professional with a deep understanding of the company's portfolio and a passion for elevating its presence in the market. With a keen eye for detail and a commitment to excellence, she ensures that our professional blog is regularly updated with insightful articles......