A gust can turn a loose solar post cap light into a wobbling, cracked fixture. The risk rises on exposed decks, open fences, and posts that flex under pressure. Knowing how to secure solar post cap lights in high winds starts with checking the whole assembly, not just tightening the lamp. The post, cap, fasteners, and light all need to work together.
For an illustrative expert voice, this guide uses Alex Morgan, a fictional composite outdoor-lighting installer. Morgan’s practical reminder: “Secure the post first; a tight light on a weak post is still at risk.” That is a useful principle, not a wind-load rating. Check the manufacturer’s instructions before changing hardware or adding adhesive. A stainless-steel screw may suit one fixture, while another needs its original clip or gasket. Avoid blocking the solar panel or battery cover.
This guide explores ten grounded ways to reduce movement: inspecting the post, tightening compatible fasteners, checking the cap’s fit, and choosing weather-suitable materials. It also covers careful use of sealant, where the product allows it, and routine checks after strong gusts. Small details matter. A missing washer or split post can be easy to overlook. Even careful installation has limits, and no simple fix guarantees survival in every storm. Notice the weak point. Recheck it.
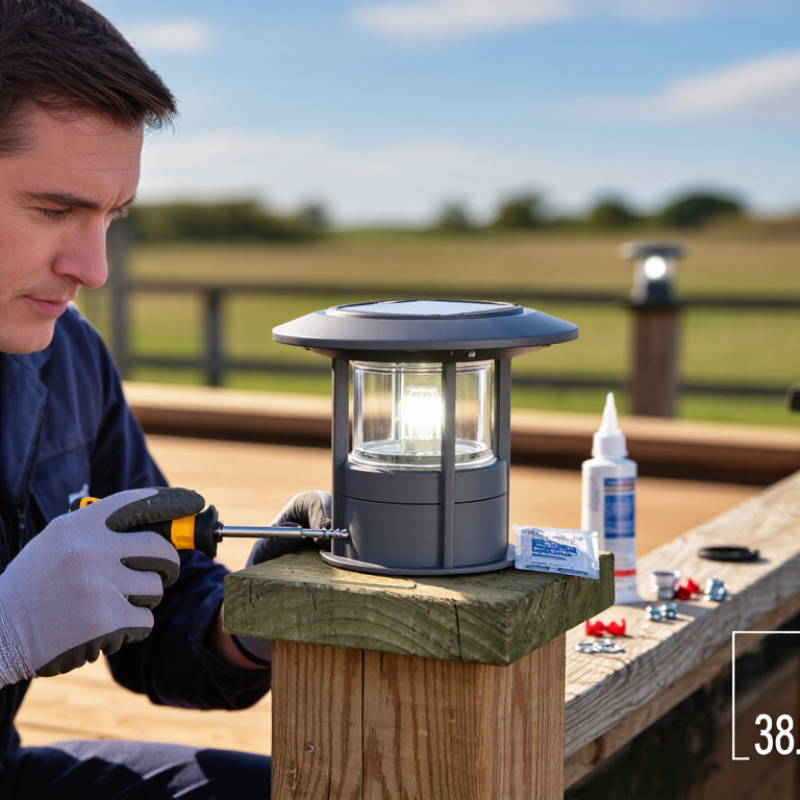
Before choosing a fastening method, look closely at the post’s surroundings. Open yards, roof edges, and gaps between buildings can funnel gusts toward a light. Exposed corners deserve extra attention. Nearby trees may soften ordinary breezes, but they are not dependable protection during storms. Notice where loose leaves or flags move, and check whether wind regularly strikes one side of the post.
Measure the post and the light’s mounting opening; do not rely on appearance alone. Check whether the post is square or round, and whether the cap sits flat without rocking. A small mismatch can leave the fixture vulnerable, even when it seems secure. I used to treat a snug fit as enough. It is not. Check the supplied mounting instructions, screw locations, and any required adapter. Never force a cap onto a post, since that can crack the housing or split the post.
Look for worn wood, loose joints, rust, or old screw holes before installation. Fix those problems first. Make sure the solar panel remains clear of branches and receives useful daylight; a tight mount is less useful if the panel sits in shade. After fitting the light, apply gentle hand pressure from several directions and watch for movement. Recheck it after a windy day. Small shifts matter. A brief inspection may miss a weakness, so check again.
Prepare the post before attaching the light. Check that it is plumb, firmly set, and free of rot, cracks, or loose fasteners. A wobbly post will not become secure just because the cap fits tightly. Wipe the top dry, then measure it against the light’s mounting plate. Trim or replace uneven, splintered surfaces so the plate sits flat.
NOAA’s Storm Prediction Center classifies thunderstorm wind gusts of 58 mph or more as severe. That is a useful reminder to take small fixtures seriously. FEMA’s P-804 wind-retrofit guidance emphasizes a continuous load path in buildings; for a post cap light, apply the same principle on a smaller scale: secure the light to the post, and the post to its support. This is an adaptation, not a fixture-specific wind test. I would also recheck the screws after installation. A tiny gap can invite movement.
Tips: Use corrosion-resistant screws suited to the post material, and predrill where the instructions recommend it. Tighten evenly; overtightening can crack plastic housings or split wood. Give the post a firm hand push before mounting the light. If it shifts, fix the post first.
Choose fasteners that match both the post material and the light’s mounting holes. For wood posts, corrosion-resistant exterior screws usually provide a dependable mechanical hold. Use screws long enough to bite securely, but not so long that they emerge from the opposite side. On composite or vinyl posts, check the manufacturer’s guidance before drilling; these materials can crack or deform under excess pressure. Check the fit. A small pilot hole helps reduce splitting in wood, while evenly tightened screws prevent the cap from rocking. Avoid overtightening, which can damage the housing or strip the hole.
Weather-resistant adhesive can help seal small gaps and limit movement, but it should not replace suitable fasteners in exposed, gusty locations. Select an adhesive labeled for outdoor use and compatible with the cap and post materials. It should tolerate rain, sunlight, and local temperature changes. Clean both surfaces, then let them dry fully; dust and moisture weaken the bond. Apply a thin, even bead rather than filling the entire cavity, where trapped water may become a problem. Let it cure. Follow the product’s stated cure time before exposing the light to wind or rain. A careful fit matters, but I would still recheck the caps after the first strong gust; small shifts are easy to miss.
Estimated dynamic wind pressure is calculated using q = ½ρv², assuming air density of 1.225 kg/m³. Actual forces on a solar post cap vary with gusts, exposure, and cap shape. Choose corrosion-resistant fasteners suited to the post material, and use weather-resistant adhesive only as a compatible supplement—not a substitute for secure mechanical fastening. Follow product instructions and local wind requirements.
Secure the fixture to a sound post, not just its decorative trim. Use corrosion-resistant exterior screws sized for the post, and drill pilot holes to reduce splitting. A small mounting bracket can help spread wind pressure across a wider area. Don’t overtighten plastic housings; they can crack, even when the screw feels firm. Check that the cap sits level and does not wobble when gently pushed.
Protect the solar components as carefully as the light itself. Aim the panel toward open sky, away from branches that can scrape it or drop debris onto it. Keep the panel surface clean, and make sure its cover and seals are seated after installation. A tight seal helps keep rain out, but it is not a guarantee against moisture. Inspect the housing, wiring, and fasteners after strong gusts. One detail is easy to miss: a fixture can look secure while its post is loosening below.
Tips: Test the cap with a gentle hand before a storm, then recheck it afterward. Tighten loose fasteners in small increments. If the post is cracked or leaning, repair that first; reinforcing the light alone may not help. Don’t improvise with heavy objects that block the panel or strain the fixture.
After a storm, inspect each solar post cap light before switching it on. Look for a tilted housing, cracked lens, loose screws, or a cap that shifts when gently touched. Check the post itself, too; a secure fixture cannot compensate for a split or leaning post. Keep your feet on dry, stable ground, and do not reach over a wet deck. Small details matter. A faint rattle may mean a fastener has loosened, even when the light still appears straight.
Wipe mud, leaves, and salt residue from the solar panel with a soft damp cloth, then let it dry. Check it in daylight. Make sure the panel faces open sky, not a newly fallen branch or debris.
At dusk, test whether the light turns on and stays steady. If it flickers, inspect for moisture, damaged wiring, or a weak battery, following the fixture’s care instructions. Tighten accessible hardware gently; overtightening can crack plastic housings.
I have seen minor wobbling dismissed as harmless, and it often returns after the next gust. Still, not every dim light means storm damage: several cloudy days can reduce charging. Recheck it after a sunny day before replacing parts.
Check open yards, roof edges, and gaps between buildings. Watch flags or loose leaves. They can reveal gust direction.
Measure the post and mounting opening. Check whether the post is square or round, and whether the cap sits flat. Never force it.
Look for rot, cracks, rust, loose joints, and old screw holes. Repair damage before mounting the light. A shaky post stays shaky.
Make sure the post is plumb and firmly set. Wipe the top dry, then trim splinters or uneven areas so the plate sits flat.
Match the screws to the post material and mounting holes. Corrosion-resistant exterior screws often suit wood; check guidance for composite or vinyl posts.
No. Outdoor-rated adhesive may seal small gaps, but it should not replace suitable fasteners where gusts are common.
Clean and dry both surfaces. Apply a thin, even bead, and follow the stated curing time. Do not fill the whole cavity.
Press the light gently from several directions and watch for movement. Recheck after a windy day. I once trusted a snug fit too much.
Securing solar post cap lights in windy conditions starts with understanding how exposed the posts are and checking that each light fits the post cap properly. Clean and dry both surfaces before installation, then choose fasteners suited to the post material and use a weather-resistant adhesive where appropriate. These simple preparations help create a firm connection without damaging the fixture.
To learn how to secure solar post cap lights in high winds, also reinforce any loose parts and protect the solar panel and other components from impact and moisture. After installation, test the light to confirm it works and remains stable. Inspect it after strong winds or storms, tighten fasteners as needed, and replace worn materials to maintain a dependable fit over time.
