How to Install Outdoor Wall Lights Without Wiring in 2026?

Time:2026-10-13 Author:Sienna
0%

Learning how to install outdoor wall lights without wiring can transform a dark entrance, patio, or garden path without opening walls. In 2026, homeowners often choose solar-powered or rechargeable battery lights for simpler upgrades. These options reduce drilling, avoid indoor cable routes, and suit rented properties. However, convenience does not remove the need for careful planning.

A reliable installation begins with the wall surface, light position, and expected sunlight. A south-facing area may charge a solar panel well, while a shaded porch may need a USB-rechargeable model. Check the product’s weather-resistance rating, mounting hardware, battery access, and motion-sensor range. A light can look bright in a showroom but disappoint beside a wide driveway. Small details matter.

The work is rarely perfectly tidy.

Before drilling, mark the bracket holes and inspect for hidden pipes or electrical cables. Use suitable anchors for brick, concrete, wood, or siding. Keep the fixture level, and seal exposed holes with an outdoor-rated sealant. Do not connect a wireless light to mains electricity unless a qualified electrician handles the work. Local building and electrical requirements may still apply, especially near pools, public paths, or shared buildings.

This guide explains practical methods, common mistakes, tool choices, and safety checks for installing outdoor wall lights without traditional wiring. It also considers winter darkness, weak sunlight, battery replacement, and motion-sensor settings. Some installations require compromise. A beautiful location may not provide enough charging light. Careful testing after sunset can reveal problems that daytime planning misses.
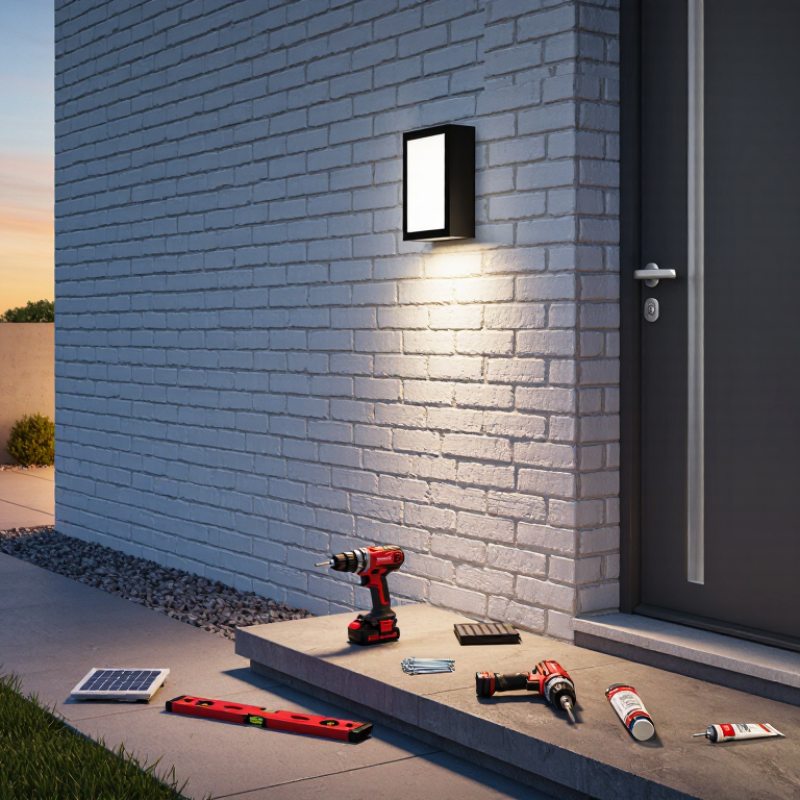
How to Install Outdoor Wall Lights Without Wiring in 2026?

Choose the Right Wireless Outdoor Wall Light

A wireless outdoor wall light can improve an entrance without opening walls or routing cables. The right choice starts with the location. Measure the mounting area, check the surface, and observe how much sunlight it receives. A solar model suits a bright, exposed wall. A battery model works better beneath a deep porch.

Look for a suitable weather-resistance rating, such as IP65, when rain and dust are common. Choose warm white light for a welcoming doorway, or neutral white for clearer steps. Motion sensors can reduce battery use, but their range matters. Test the detection angle before fixing the light permanently. Too sensitive, and passing cars may trigger it all night.

I once installed a sensor light too close to a busy path. The battery emptied within days. That mistake changed my checklist. I now compare brightness, battery capacity, charging time, and replacement costs. Mount the fixture firmly with outdoor-rated screws and wall anchors. Keep the sensor away from vents, reflective glass, and tree branches. Follow the installation guide carefully. Some lights look simple, yet their controls are surprisingly unclear. Test the light after sunset, not only in daylight. Recheck the mount after heavy rain or strong wind. A wireless light saves wiring effort, but it still needs thoughtful placement and regular maintenance.

Gather Tools, Batteries, and Mounting Materials

How to Install Outdoor Wall Lights Without Wiring in 2026?

Start with the right materials. Choose a battery-powered or solar wall light rated for outdoor exposure. An IP65 rating protects against dust and water jets, but not full immersion, according to IEC 60529. Gather a tape measure, pencil, level, screwdriver, drill, suitable wall anchors, screws, and spare batteries.

The U.S. Department of Energy reports that LED lighting uses at least 75% less energy than incandescent lighting. That efficiency can reduce battery changes, although cold weather may still shorten battery life.

Tips: Test the light before mounting. Check its sensor range at night. Keep batteries dry. Match the anchor type to brick, concrete, wood, or siding. I once mounted a light too close to a door, and the opening angle blocked its sensor. Small mistakes matter.

Mark two level mounting points, then drill slowly with eye protection. For masonry, use masonry anchors; for wood, fasten into solid material when possible. Do not rely on weak decorative panels.

Install fresh batteries with the correct polarity, or expose the solar panel to direct daylight. Tighten screws firmly, but avoid crushing plastic housings. Leave enough clearance to remove the battery cover later.

A practical check is simple: walk past the fixture several times, then inspect brightness after a rainy evening. My first placement looked neat but cast a harsh shadow, so I moved it higher and angled it toward the path.

Plan the Light Position and Check the Mounting Surface

Installing outdoor wall lights without wiring starts with accurate placement. Mark the light’s center at eye level, usually 60 to 72 inches above the ground. Check nearby steps, doors, paths, and camera views. The light should illuminate movement without shining into windows or neighbors’ eyes. Battery and solar models still need practical access for charging and maintenance.

Inspect the mounting surface before drilling. Solid brick, concrete, and timber usually provide dependable support when matched with suitable anchors. Stucco, vinyl siding, and thin cladding may need additional backing. Tap the surface gently and look for cracks, hollow areas, or loose panels. A small level helps, but do not trust it alone. Step back and view the marked position from several angles. My first layout once looked balanced up close but sat too low from the walkway.

Tips: Hold a paper template against the wall before making holes. Leave space below the fixture for battery removal. Keep solar panels clear of deep shade, roof overhangs, and seasonal foliage. Use outdoor-rated fasteners and seal openings carefully. Do not rush this part. A misplaced hole can weaken the surface and spoil the final alignment. Check the installation guide for weight limits, spacing, and weather requirements before mounting.

How to Install Outdoor Wall Lights Without Wiring in 2026? - Plan the Light Position and Check the Mounting Surface

Planning data for battery-powered or solar-powered outdoor wall lights. Confirm the product instructions and local electrical and building requirements before installation.
Step Planning Dimension Practical Target or Fact How to Check It Installation Decision
1 Mounting height About 1.8–2.4 m above the finished ground or walking surface is a useful planning range for many residential wall lights. Measure vertically from the pavement, deck, or finished ground level to the intended center of the fixture. Good starting point Adjust for the fixture size, glare control, door hardware, and local requirements.
2 Door and pathway alignment Place the light where it illuminates the entry handle, steps, and immediate walking area without shining directly into eye level. Stand on the approach path after dark or simulate the beam with a flashlight. Check shadows caused by roof overhangs and railings. Proceed if the entry surface and walking route are evenly visible.
3 Clearance from doors and windows Keep the fixture clear of the door swing, trim, window operation, gutters, and movable shutters. The exact clearance depends on the fixture dimensions. Open and close the door or window fully and mark the fixture outline on the wall with removable tape. Reposition if the light, sensor, or mounting plate interferes with movement or maintenance.
4 Solar exposure A solar light needs unobstructed daylight on its panel. Direct sun generally provides more charging energy than shaded or north-facing locations in the Northern Hemisphere. Observe the wall and proposed panel location throughout the day. Check for shade from eaves, trees, neighboring buildings, and seasonal foliage. Use another location or choose a model with a separate solar panel if the panel remains shaded.
5 Weather exposure and enclosure For exposed outdoor locations, select a fixture with an ingress-protection rating suitable for rain, dust, and the installation environment. IP44 protects against splashing water; higher protection may be needed for more severe exposure. Read the product label or instructions and compare the stated IP rating with the site exposure. Do not rely on appearance alone. Match rating to exposure and keep seals, covers, and battery compartments correctly closed.
6 Wall material Common surfaces include wood siding, brick, concrete, stone, stucco, and exterior cladding. Each requires a different anchor or screw type. Inspect an inconspicuous area or consult construction drawings. Identify whether the fixing will enter solid material, a stud, mortar, or a hollow cavity. Select compatible hardware rather than using one fastener type for every surface.
7 Surface condition The mounting area should be sound, dry, flat enough for the mounting plate, and free from loose paint, crumbling mortar, rot, or active water leakage. Press and lightly tap the area, inspect for movement or cracks, and check for dampness around joints and penetrations. Do not mount on deteriorated material until the surface has been repaired.
8 Stud or solid fixing point A wood stud, masonry fixing point, or other structurally sound substrate provides better support than thin decorative cladding alone. Use a stud finder where appropriate, review framing information, or drill only after confirming that the selected anchor suits the substrate. Fix securely with the fastener load supported by the structure, not just the surface finish.
9 Fastener selection Exterior-rated, corrosion-resistant fasteners are appropriate for outdoor use. Masonry requires a suitable masonry screw or anchor; hollow walls require an anchor designed for cavities. Match the screw diameter, length, anchor type, and drilling method to the wall material and the fixture manufacturer’s instructions. Replace unsuitable hardware if it is indoor-only, too short, corroded, or incompatible with the substrate.
10 Water management Any wall penetration can become a path for water. The fixture should sit flush and use the supplied gasket or weather-sealing method where specified. Check that the mounting plate is not rocking, the seal is continuous, and the hole location avoids obvious drainage paths and joints. Seal as instructed without blocking designed drainage openings in the fixture.
11 Motion-sensor coverage Detection distance and field of view vary by model. A typical sensor may cover several metres, but the product specification is the controlling value. Align the sensor toward the approach path rather than directly at a nearby heat source, busy road, or moving tree branches. Test after mounting and adjust sensitivity, time, and direction if those controls are provided.
12 Maintenance access Leave enough room to replace batteries, clean the solar panel, remove the diffuser, and inspect the seal without dismantling the wall surface. Hold the fixture and battery cover in position before drilling. Confirm that a ladder can be placed safely if needed. Choose accessible position to reduce future maintenance risk.
13 Hidden utilities Do not drill where electrical cables, plumbing, gas lines, or other concealed services may be present. Review available plans, inspect both sides of the wall, and use an appropriate detection method before drilling. Stop and verify if the utility route cannot be ruled out safely.
14 Final light test The finished beam should cover the required area while limiting glare, dark spots, and light directed toward neighboring windows or public roads. Test the light from the property boundary, entry path, and nearby windows during darkness. Keep or adjust the angle and position before permanently tightening all hardware.

Install the Mounting Bracket and Secure the Light

Choose a mounting location with clear sunlight, stable masonry, or a solid wood stud. A cordless outdoor wall light still needs mechanical support. Hold the bracket against the wall and mark every hole through the bracket, not by eye. A level helps, but do not trust it alone on uneven siding.

The U.S. Department of Energy reports that LED products use at least 75% less energy and can last up to 25 times longer than incandescent lighting. That efficiency does not excuse weak installation. For brick or concrete, drill with the correct masonry bit and insert outdoor-rated anchors. For wood, drive corrosion-resistant screws into the stud. Leave no loose dust inside the holes. It can reduce grip.

Tighten the bracket until it sits firmly, then stop. Over-tightening can distort thin metal or crack plastic. Add an appropriate outdoor seal around upper screw entries, while leaving a small drainage path below. This detail is easy to miss. Attach the light body, battery housing, or solar panel according to its instructions. Check that the unit does not wobble when pressed gently. Test the motion sensor at night and confirm the panel faces usable daylight. My first installation would have looked level, but the beam exposed a slight tilt. Recheck it before final tightening. Industry weather-protection guidance under IEC 60529 also makes the enclosure rating important; select a rating suited to exposed rain, not merely a sheltered porch.

How to Install Outdoor Wall Lights Without Wiring in 2026?

Install the Mounting Bracket and Secure the Light

The chart shows typical DIY planning time for installing one battery-powered or solar outdoor wall light on a sound exterior wall. The estimated total is approximately 35 minutes, excluding masonry repairs, ladder setup, or troubleshooting.

Test the Light and Adjust Its Settings

After mounting a wireless outdoor wall light, test it before tightening every screw. Press the power button and check whether the light responds consistently. For solar models, test during daylight, then repeat after dusk. Cover the panel briefly if the sensor needs darkness. Battery-powered lights should turn on without flickering or delayed activation.

Walk past the light from different angles. Check the motion sensor’s range, response time, and brightness. Adjust the sensor downward if it reacts to passing cars or moving tree branches. Set the timer for a short period at first. A three-minute setting can reveal problems without draining the battery overnight. Keep the beam away from bedroom windows and nearby roads.

My first test seemed successful, but the light activated whenever wind moved a shrub. That mistake taught me to test in changing conditions. I also noticed that maximum brightness was unnecessary near the entrance. A medium setting gave clearer visibility and preserved battery life. Check the mounting angle again after adjusting the controls. Small changes can create dark spots near steps. If the light still flickers, clean the solar panel, reseat the battery, or inspect the contacts. Do not ignore repeated faults. Moisture inside the housing may require professional assessment, especially after heavy rain.

FAQS

Where should an outdoor wall light be installed?

Choose a location with direct sunlight, stable masonry, or a solid wood stud. Avoid loose siding or weak surfaces. Clear daylight matters for solar charging.

How should the mounting holes be marked?

Hold the bracket against the wall and mark every hole through it. Use a level, but check uneven siding manually. A level can mislead you.

Which fasteners suit brick, concrete, and wood?

Use a correct masonry bit and outdoor-rated anchors for brick or concrete. For wood, drive corrosion-resistant screws into a solid stud. Remove loose drilling dust before inserting anchors.

How tightly should the bracket screws be tightened?

Tighten until the bracket sits firmly, then stop. Excessive force can bend thin metal or crack plastic. I once tightened too much. It was unnecessary.

How can water protection be improved?

Seal the upper screw entries with suitable outdoor sealant. Leave a small drainage path underneath. Choose an enclosure rating designed for exposed rain, not only sheltered areas.

What should be tested before final tightening?

Press the power button and check consistent activation. Test solar lights in daylight and again after dusk. Walk past from several angles. The light should not wobble.

How should motion settings be adjusted?

Start with a short timer, such as three minutes. Aim the sensor slightly downward if cars or moving branches trigger it. Keep the beam away from bedroom windows and roads.

What should be checked if the light flickers or reacts incorrectly?

Clean the solar panel, reseat the battery, and inspect the contacts. Repeated flickering should not be ignored. Moisture inside the housing may need professional assessment.

How can battery life be preserved?

Use medium brightness when maximum brightness is unnecessary. Recheck the mounting angle after changing settings. Small adjustments can prevent dark spots near steps.

Conclusion

Learning how to install outdoor wall lights without wiring can make exterior lighting more convenient and flexible in 2026. Start by choosing a suitable wireless outdoor wall light with enough brightness, weather resistance, and a power source that matches your needs. Gather the necessary batteries, drill or screwdriver, level, measuring tape, anchors, and screws before beginning. Select a position that provides useful illumination while avoiding doors, windows, drainage paths, and unstable surfaces. Check that the wall material can support the light and mark the mounting points carefully.

Next, attach the mounting bracket securely using appropriate hardware for the surface, then fix the light to the bracket according to its instructions. Insert or charge the batteries, turn the light on, and test its sensor, timer, brightness, or motion settings. Finally, adjust the angle and settings so the light covers the desired area without creating unnecessary glare. Regularly inspect the fixture and replace or recharge its power source when needed.

Sienna

Sienna

Sienna is a skilled marketing professional with a deep expertise in our company’s core products and services. With a passion for innovation and detail, she plays a pivotal role in crafting insightful blog posts that not only highlight the unique features of our offerings but also provide valuable......