An outdoor dusk to dawn sensor should switch a light on at sunset and off after sunrise. When it fails, the fixture may remain dark, stay lit all day, or flicker near dusk. These symptoms often look similar, but they can have different causes. Dirt on the lens, loose wiring, water intrusion, incorrect settings, and a worn sensor are common examples.
This guide explains how to troubleshoot a faulty outdoor dusk to dawn sensor with practical, safety-focused checks. You will learn how to inspect the sensor, confirm power, test the lamp, and identify whether replacement is sensible. A flashlight, dry cloth, non-contact voltage tester, and the manufacturer’s instructions can help. Do not guess around live wiring. Turn off the circuit breaker before opening connections, and contact a qualified electrician when wiring appears damaged or unfamiliar.
Begin with the simplest details. Is the sensor facing a porch light, reflective wall, or passing security lamp? Artificial light can confuse its photocell. Rainwater inside the housing may create corrosion that is difficult to notice at first. A sensor can also fail after years of heat and winter freezing. I once treated a similar problem as a defective lamp, but the real issue was a dirty, shaded sensor. That mistake was avoidable.
Reliable troubleshooting requires patience, careful observation, and voltage testing within safe limits. If the fixture uses an integrated sensor, replacing the entire unit may be more practical. Do not ignore repeated tripping or exposed conductors. Small outdoor faults can become serious.
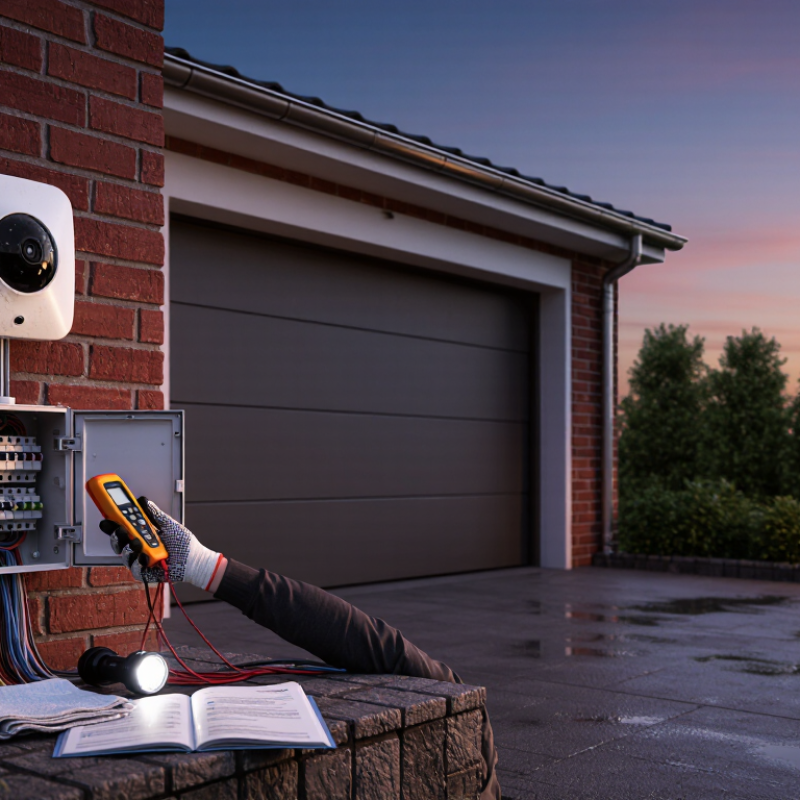
2026 How to Fix a Faulty Outdoor Dusk to Dawn Sensor?
Identify the Symptoms of a Faulty Outdoor Dusk-to-Dawn Sensor
A faulty outdoor dusk-to-dawn sensor often reveals itself through timing errors. The light may stay on at noon, remain dark after sunset, or flicker during cloudy weather. I have also found delayed activation, repeated cycling, and false starts near reflective walls. These symptoms can indicate a dirty lens, water inside the housing, loose wiring, or a failing photocell. Do not assume the sensor is defective immediately. Nearby porch lights can confuse its light reading.
The International Energy Agency’s 2024 Energy Efficiency report estimates that lighting uses about 15% of global electricity. The U.S. Department of Energy also reports that properly commissioned lighting controls can reduce energy use by roughly 20–30% in many buildings. A sensor that misreads daylight wastes power and shortens lamp life. Check the lens at dusk. Observe whether the light responds within several minutes. Inspect seals, mounting direction, and visible condensation. A multimeter test can help, but only qualified personnel should test energized circuits. My first diagnosis is sometimes wrong, especially when moisture hides behind the cover.
Tips: Clean the sensor with a dry cloth. Test it away from direct light sources. Photograph the symptom and record the time. Replace the sensor only after checking wiring, supply voltage, and grounding. A simple log often exposes a pattern that one quick inspection misses.
How to read the chart: A healthy dusk-to-dawn sensor keeps the outdoor light OFF during daylight and switches it ON after sunset. A light that stays ON throughout the day may have a sensor stuck in the night state, while a light that stays OFF after dark may have a failed sensor, wiring issue, or power problem.
A dusk-to-dawn light needs stable power before sensor testing begins. Turn off the circuit breaker, then inspect the fixture, switch, and junction box. Use a voltage tester to confirm the supply is present and safe. The U.S. Department of Energy identifies lighting controls as an important efficiency measure, while the International Energy Agency reports that lighting uses roughly 15% of global electricity demand. A failed sensor can waste energy every night.
Check the wiring carefully. The line conductor should connect to the sensor’s input, while the load conductor should lead to the lamp. The neutral connection must remain tight and continuous. Look for loose wire nuts, corrosion, cracked insulation, or water inside the box. Follow the sensor’s wiring diagram, not memory. A small mistake here causes confusing symptoms.
Cover the sensor completely with opaque tape during daylight testing. The lamp should respond after a short delay, though some models need several minutes. Clean the sensor window and check that nearby lighting does not shine directly onto it. The National Electrical Code, referenced by NFPA 70, requires suitable wiring methods and listed equipment for the installation environment. I have found that technicians often replace the sensor too quickly. Sometimes the real fault is a weak neutral or a loose connection. If voltage readings remain inconsistent, stop testing and call a qualified electrician.
A dirty sensor can mimic an electrical failure. Turn off power, then inspect the small sensing window for dust, insects, water spots, or cracks. Wipe it gently with a soft, damp cloth and mild soap. Avoid abrasive cleaners. They can scratch the lens and scatter incoming light. I have seen a sensor work again after one careful cleaning, although that result is not guaranteed.
Test the fixture under different light conditions. Cover the sensor completely with opaque tape or a dark cloth during daylight. The lamp should activate after its built-in delay, which may last several minutes. Remove the cover and shine a bright flashlight toward the sensor. It should switch off after another delay. Test it again at dusk, near a window, and under nearby porch lighting. A flashlight test alone can mislead you.
The U.S. Department of Energy reports that LED lighting uses at least 75% less energy and lasts up to 25 times longer than incandescent lighting.
A faulty sensor can waste those savings by keeping the lamp on during daylight. Check the wiring only if you are qualified, and stop when moisture or damaged insulation appears. My own weak point is patience; repeated testing feels slow, but changing parts too early often hides the real fault. If the sensor ignores clear light changes after cleaning, professional diagnosis is safer.
A faulty dusk-to-dawn sensor often causes constant lighting, delayed activation, or complete silence. Begin by switching off the circuit breaker. Check the bulb, socket, wiring, and sensor lens. Dirt, spider webs, or nearby porch lighting can confuse the photocell. Cover the sensor with dark tape for several minutes, but do not touch exposed wires. If the light remains off, the sensor may have failed.
Replacing the defective sensor is practical when the fixture has accessible wiring. Match the replacement voltage, load rating, wire colors, mounting size, and outdoor weather rating. LED lamps need special attention. Some older sensors cannot handle LED driver startup current and may flicker or stay on. Tighten each connection securely, then seal the mounting area against rain. A qualified electrician should inspect uncertain wiring or damaged insulation.
A compatible light fixture may be better when the sensor is sealed, integrated, or difficult to remove. Confirm the fixture supports your supply voltage and preferred lamp type. Check the sensor’s detection range and installation direction before purchase. I once blamed a sensor, but a loose neutral wire caused the problem. That mistake was avoidable. Test the fixture at dusk and again at dawn. Watch for flickering, heat, moisture, or repeated breaker trips. Stop testing if any warning sign appears.
A faulty outdoor dusk to dawn sensor can leave a light glowing at noon or dark after sunset. Start by switching off the power before inspecting the fixture. Look for cracked covers, loose wires, water marks, or dirt covering the sensor window. Moisture often creates confusing symptoms.
Restore power and test automatic operation during daylight. Cover the sensor completely with a thick cloth, then wait several seconds. The light should activate if the wiring and lamp are working correctly. Remove the cloth and allow natural light to reach the sensor. The light should turn off after its delay period. Some sensors react slowly, so avoid making quick judgments.
I once replaced a sensor too early. The real problem was a loose connection. That mistake was expensive and unnecessary. If the light still behaves incorrectly, check the lamp, circuit, and connections with suitable testing equipment. Stop if wiring appears damaged, and use a qualified electrician.
Tips: Keep the sensor window clean and point it away from porch lights, windows, and reflective surfaces. Trim branches that block daylight. Check the mounting angle after storms. Use outdoor-rated seals, but do not seal drainage openings. Record when the fault occurs. A light failing only after rain suggests moisture, not a simple timing problem. Test the system every few months, because small cracks can become serious failures.
| Inspection Area | Normal Finding | Fault Indication | Recommended Action | Verification Method |
|---|---|---|---|---|
| Power supply | The supply voltage matches the rating printed on the fixture or sensor. | No light, intermittent operation, or a sensor that resets unexpectedly. | Turn off the circuit before tightening connections. Have a qualified electrician test the circuit if voltage is absent or unstable. | Use a properly rated tester and compare the reading with the product specification. Do not work on energized wiring. |
| Sensor lens | The photocell window is clean, dry, and unobstructed. | The light remains on during the day or turns on too early. | Clean the lens with a soft, dry or slightly damp cloth. Remove dirt, tape, paint, leaves, and insect nests. | After cleaning, expose the sensor to bright daylight and observe whether the lamp switches off after its normal delay. |
| Installation position | The sensor faces open sky and is not aimed toward the controlled lamp. | The lamp cycles on and off or stays on after dark. | Reposition or shield the sensor so it cannot directly receive light from the fixture or nearby bright sources. | Check the sensor at night while the lamp is operating. Look for reflected light on the sensor window. |
| Manual override or test mode | The control is set to automatic operation, not continuous ON or OFF. | The fixture responds to a manual switch but not to daylight changes. | Return the switch, timer, or control selector to the automatic position and follow the device instructions. | Perform one complete dusk-to-dawn cycle rather than judging operation immediately after changing the setting. |
| Wiring and terminals | Conductors are secure, correctly connected, and protected from moisture. | Flickering, buzzing, heat damage, corrosion, or operation that changes when the housing is moved. | Disconnect power, inspect for loose or corroded terminals, and replace damaged wiring or connectors. Use an electrician when required. | Visually inspect with power isolated. Confirm that cable entries and covers are properly sealed. |
| Weather sealing | The gasket, cover, and cable entry are intact and water cannot enter the enclosure. | Condensation, water marks, rust, corrosion, or repeated failure after rain. | Dry and repair the enclosure if permitted by the instructions; replace compromised seals or the sensor when necessary. | Inspect after wet weather and confirm that the enclosure remains closed and suitable for outdoor use. |
| Nearby lighting and reflections | The sensor detects natural ambient light rather than artificial light. | The lamp turns off when a nearby light is switched on and turns back on when it is switched off. | Redirect, dim, shield, or relocate the nearby light source. | Test the sensor with nearby lights on and off while keeping the installation unchanged. |
| Load compatibility | The connected lamp load is within the sensor's voltage, wattage, and load-type limits. | Rapid cycling, a humming relay, premature failure, or a lamp that will not start. | Compare the fixture load with the sensor specifications. Use an approved relay or compatible control if the load exceeds the rating. | Read the electrical ratings and calculate the connected load before replacing parts. |
| Temperature and physical damage | The housing is intact and installed within the environmental limits stated by the manufacturer. | Cracks, melted plastic, discoloration, distorted seals, or failure during temperature extremes. | Replace physically damaged equipment and improve mounting protection or ventilation where appropriate. | Compare the installation conditions with the specified operating temperature and outdoor-use requirements. |
| Final automatic-cycle test | The lamp switches on at darkness and switches off in daylight without manual assistance. | The lamp does not change state, cycles repeatedly, or requires repeated power resets. | Replace the sensor after basic checks if the supply, wiring, load, position, and sealing are correct. | Record the date, weather, switching behavior, and corrective action for future maintenance. |
Stable power is essential. Turn off the circuit breaker first, then use a voltage tester safely. Inconsistent readings may indicate a weak neutral or loose connection.
Check the input, lamp-load, and neutral connections against the wiring diagram. Look for loose wire nuts, corrosion, cracked insulation, and water inside the junction box.
Cover the sensor completely with opaque tape or a thick cloth. Wait through its built-in delay. The lamp should turn on. Timing varies.
Remove the cover and shine a bright flashlight toward the sensor. The lamp should switch off after a delay. A flashlight alone can mislead you.
Yes. Dust, insects, water spots, and cracks can imitate electrical failure. Clean the window gently with a soft, damp cloth and mild soap.
Porch lights, windows, reflective surfaces, branches, and nearby bright areas can affect readings. Point the sensor toward open daylight and trim blocking branches.
Stop when you see damaged insulation, exposed wiring, water, or unstable voltage. Contact a qualified electrician. Safety matters more than a quick repair.
Keep the sensing window clean, check the mounting angle after storms, and inspect outdoor seals. Do not block drainage openings. Record when failures happen, especially after rain.
Not always. A loose connection, faulty lamp, or weak neutral may cause the symptoms. I once replaced a sensor too early. That mistake was avoidable.
Learning how to troubleshoot a faulty outdoor dusk to dawn sensor starts with identifying common symptoms, such as lights staying on during daylight, failing to turn on at night, or switching on and off unexpectedly. Begin by checking the power supply, circuit protection, wiring, and sensor connections for loose, damaged, or corroded components. Turn off power before inspecting any electrical connections, and confirm that the fixture is receiving the correct voltage.
Next, clean the sensor lens and remove dirt, moisture, or objects blocking its view. Test the light under different conditions by covering the sensor or exposing it to bright light, allowing enough time for the fixture to respond. If the sensor remains unresponsive, replace it with a compatible component or install a suitable light fixture. Finally, verify that the light operates automatically through a complete day-and-night cycle. Regular cleaning, weather protection, secure wiring, and periodic testing can help prevent future sensor failures.
